Instant Way to Export Exchange 2010 Mailbox to PST File
In this write-up, we will discuss the entire solution to exporting Exchange 2010 mailbox to PST using different methods. We show the entire step-by-step guide to export the mailbox data.
Exchange Server is used as a Mail Server Application that has been developed by Microsoft and is the backbone of the complete IT organization. It manages the entire data of all the employees of the company. All the persons in the company have a separate mailbox folder and is also a public folder. The mailboxes can be easily accessed by all the employees present in the organization.
A lot of users are facing the issues to export mailbox to PST Exchange 2010. Even we had also received plenty of issues regarding the same to carry out the better task.
We will discuss 3 different methods here that include both the manual as well ad professional solution. Using the Powershell commands, Exchange Admin center, and using one of the effective utilities, we will take out the mailbox data from Exchange 2010 that meets the user’s needs and requirements.
Export Exchange 2010 Mailbox to PST Using Exchange Admin Center
Using the EAC method, it is possible for users to export the Exchange mailbox data instantly. Here, you will have some options that can easily request to export PST Exchange 2010. Follow the steps mentioned below:
- Run EAC in your system and log in there as admin.
- Then, go to
Recipients >> Mailboxes.

- Click on 3 dots, and there will you see more options.
- Select the option “Export to a File”.

- Choose the user mailbox from there.
- Enter the location and choose the option “Export only the contents of this mailbox”.
- After that, browse the shared folder path and enter the .pst file name.

- Choose the user account that has the permission.
- Finish it, and wait for some time. Once the process will be done, you will receive an email from Exchange.
Export Exchange 2010 Mailbox to PST - Using Exchange Powershell
In Recipient Management, under the Roles section, select the "+" option
Expert Solution to Export Exchange 2010 Mailbox to PST
One of the highly-rated solutions is, SysTools Exchange Export Software. It is a powerful utility that has the ability to
export the entire mailbox instantly without facing any kind of
issues. The tool has been developed by professionals in order to
understand the needs and queries of the users. Furthermore, it
possesses multiple other features and will carry out the results as
soon as possible with 100% accuracy.
The mailbox will be
exported along with including data items such as contacts, calendars, to-do lists, journals, and other data items. It has the ability to export Exchange public folders to PST, disconnected, disabled, enabled,
corrupted and other mailboxes according to the user’s convenience.
Moreover, this software will not work on the Live Exchange Server Environment and must have Outlook installed and configured. Just Free download the mentioned tool and start exporting the data.
Key Features Of Automated Software
- The tool is easy to use and provides a user-friendly interface that can be used by all the users whether they are from technical as well as from non-technical backgrounds.
- It configures the entire account just by entering the login credential details there.
- Ability to automatically scans, detect and load the active directory on the panel.
- Supports all types of Exchange versions such as 2007, 2010, 2013, and 2016.
- Other than that, will create a UNICODE PST file that can be supported by all the versions of Outlook such as Outlook 2007, 2010, 2013, and 2016.
- Filter Search option to locate a particular data on the panel using different options.
- The date range option will carry out the emails of a specific duration.
- Once the entire export and extraction process will be done, it will generate an Export Report in the CSV format that gives all the details.
- Maintains the original formatting of the entire data structure and also managed the mailbox folders such as Inbox, Sent, Drafts, Trash, etc.
- Compatible with all the versions of Exchange Server, Windows OS, and all editions of Outlook.
How to Export Exchange 2010 Mailbox to PST? Step-By-Step Process
Step 1: Download > Install > Launch the mentioned utility on your Windows OS system.
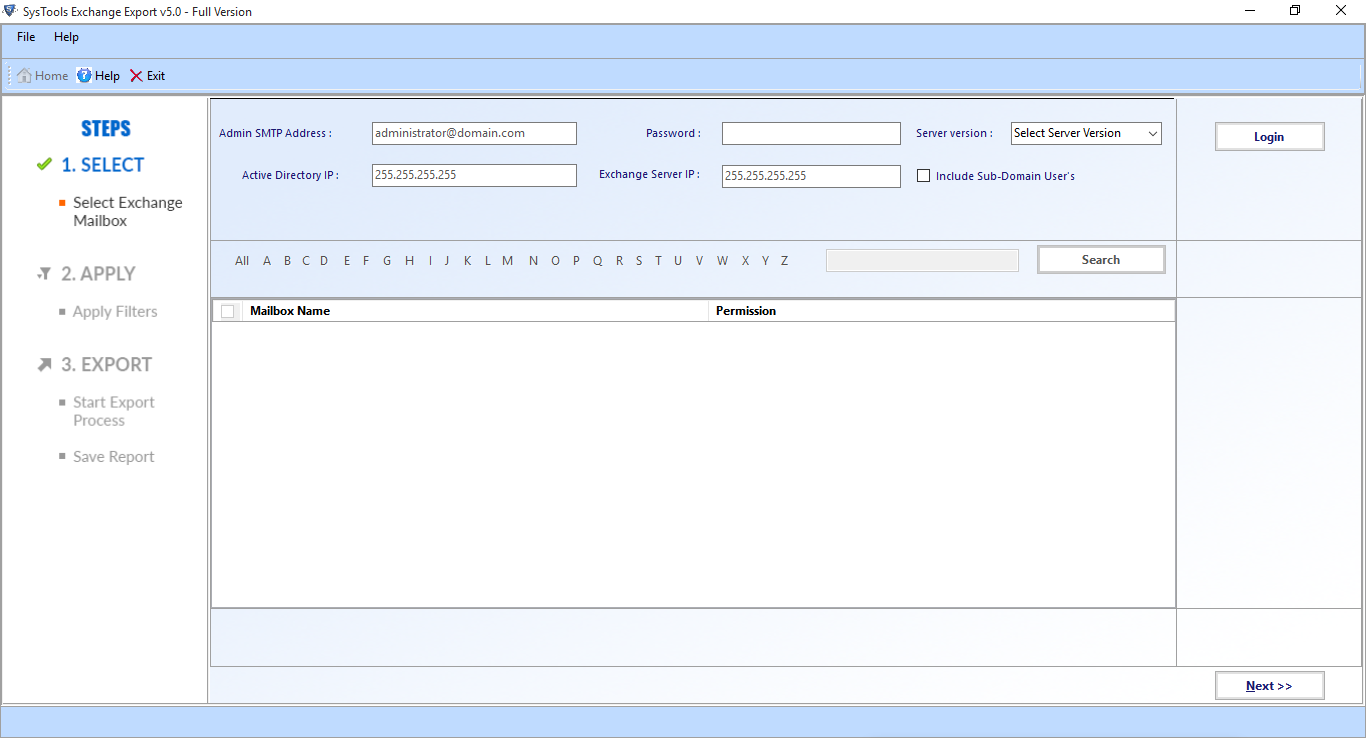
Step 2: Insert the Exchange credentials such as (Exchange Administrator User-name and Password) and IP Address of Server. To Search Mailboxes in Sub-domain > Select Exchange Server version > Click on the Login button
Step 3: Now select the desired mailbox and click on the Next button
Step 4: Select all Categories> Click on the browse button to set the destination path to save the resultant PST File on the system > Click on the export button
Note: We have provided the entire export Exchange 2010 mailbox to PST. You can also use the mentioned utility for all the other versions of Exchange such as Exchange 2010, 2013, 2016, and 2019 and this software can only work on Live Exchange Server Environment and Outlook installed in the system. Apart from that, if you have offline Exchange Database or EDB Files stored, and you want to convert them into PST or other desired formats such as MBOX, EML, HTML, MSG, and others, then we recommend you to Free Download EDB File Converter.
Conclusion
Hence, we have mentioned the three solutions in detail that provides the best results with 100% accuracy. Users after using this solution can easily Export Exchange 2010 Mailbox to PST instantly without facing any kind of issue. Moreover, if we talk in-depth, then using the Exchange Admin Center and using Powershell option also, users face issues while exporting the mailbox. So, it is better to continue with one of the best automated solutions mentioned and acquire the results faster and conveniently.


0 comments:
Post a Comment
Post a reply